Unit 2 - Spirals

|

|

|
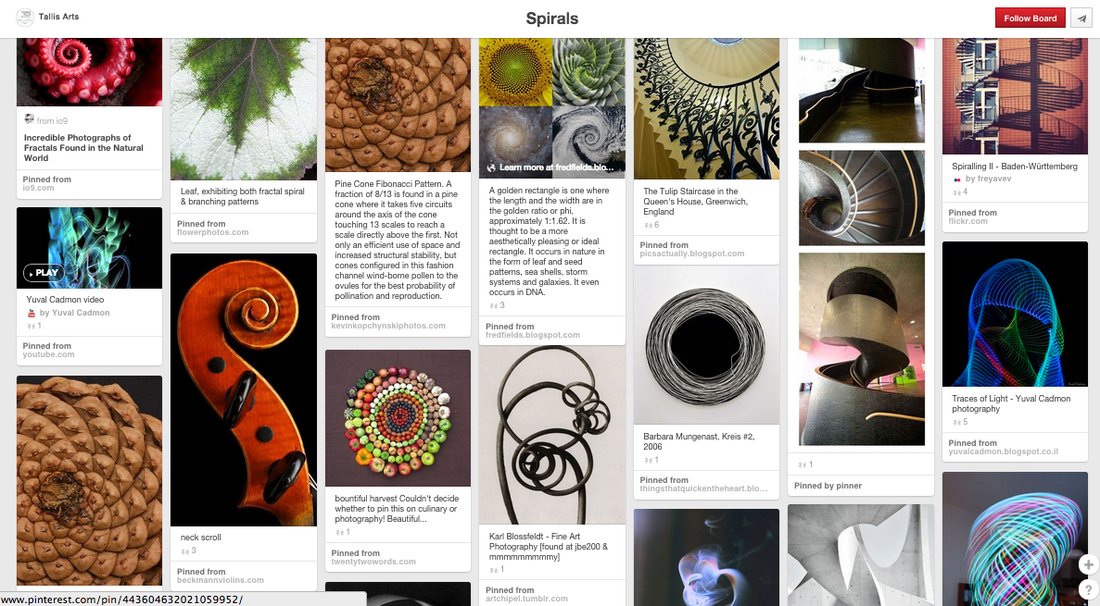
Pinterest Board
To start my experiment I started look at Pinterest to gather some ideas of my chosen subject; spirals. I think I would be successful in this unit by gathering pictures and information for my chosen topic. I will carry on looking at photographers and gets ideas and thoughts from them to improve my work.
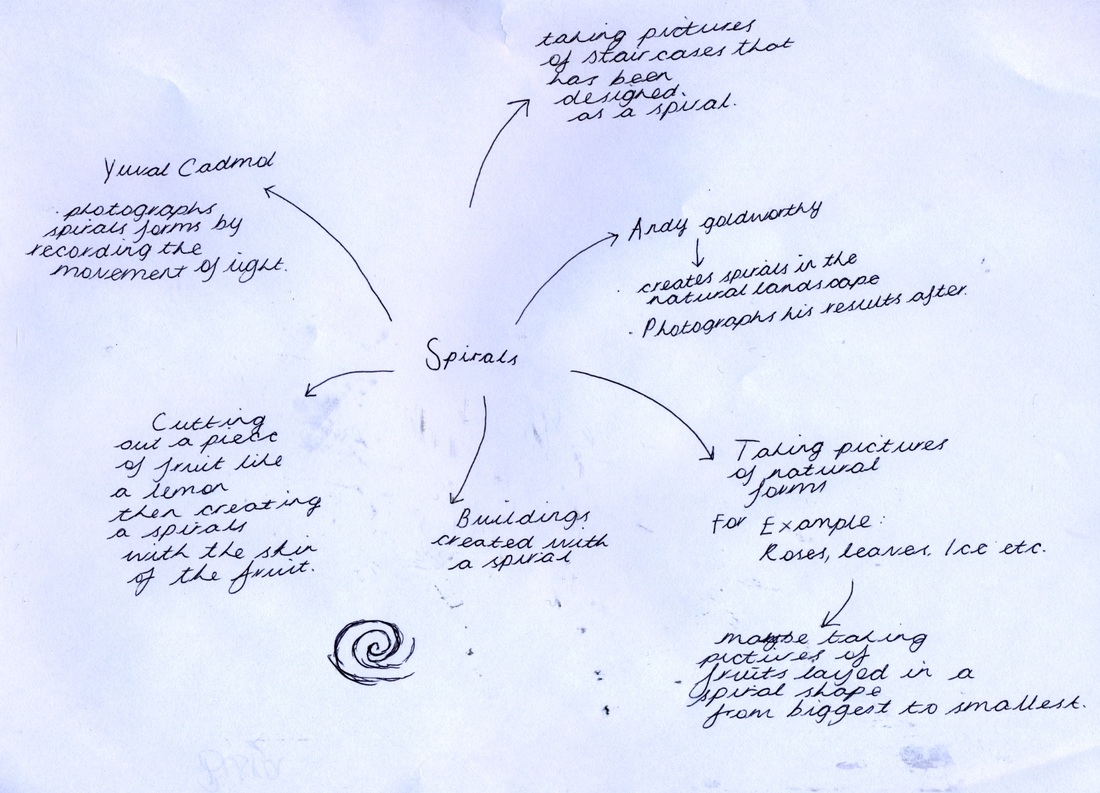
Mindmap...
I have created a mind map to gather some of my ideas.
Andy Goldsworthy
Andy Goldsworthy's photographer and using environmental equipment to produce sculpture and land art with whatever natural objects he could find. Goldsworthy's work uses really bright colours, including bright coloured flowers, leaves, mud, pinecones, snow, stone, twig, and thrones.


Andy Goldsworthy's work.
By viewing this video you can see the pressure he is in by just trying to create the sculpture with objects he collects from natural forms. You can see that with the objects he has chosen the detail and the creation he has created is incredible; for example by finding ice pieces he would find a place to create the sculpture which he has chosen a tree; to create the design he wanted and giving that detail he would bite it of so it would be a perfect fit to the other pieces.
Critical Understanding.
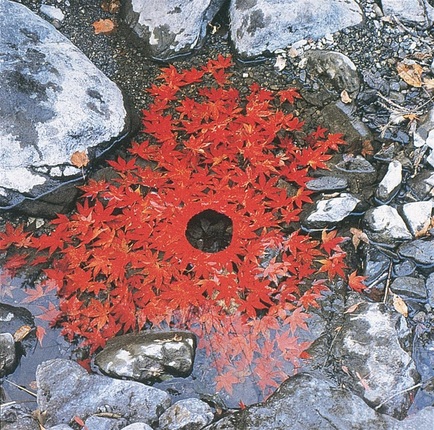
I have chosen this photographer this is because he focuses on spirals, his photography is full of bright colours, shapes and sizes. In the picture it is showing a set of leaves spiralling out to make it look like a flower, he has used many bright colours with different shapes and sizes of leaves. The photographer might have chosen to create a spiral with leaves because you could see the actual design that he was trying to create. Also the thing that I have also realised is that he has used different several leaves from different seasons. His has probably chose to take the image in colour so you could see the actual design and the patterns of the leaf with also the colour of the leaves but if it was in black and white you wouldn't of be able to see any of them. Coming to the composition of the image is a really calm, still and clearly organised image it hasn't got any movement or action. If I was with the photographer at the time when he was shooting this image, as you can see this image has been taken from birds eye view so he probably got a ladder and took the picture while on the ladder so that he could get the image clearly from the top. He is probably really close the subject so you could see the pattern that he designed but if he was really far away from the subject you probably couldn't have seen the picture as detailed as if he took it in close up. As the photographer was taking the picture most probably he was really still while taking the picture.
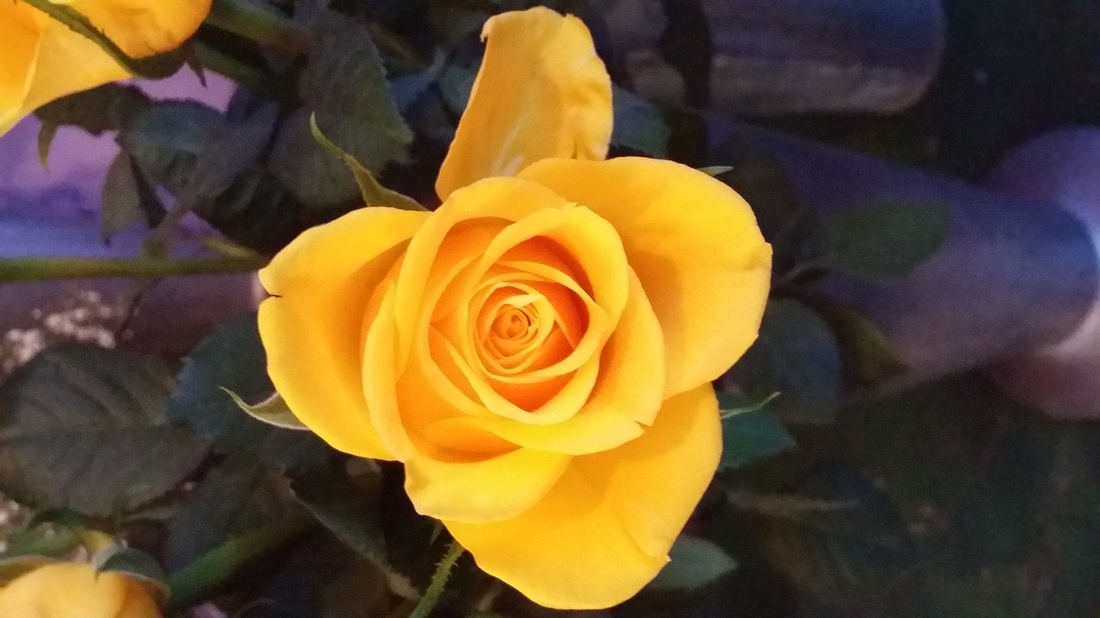
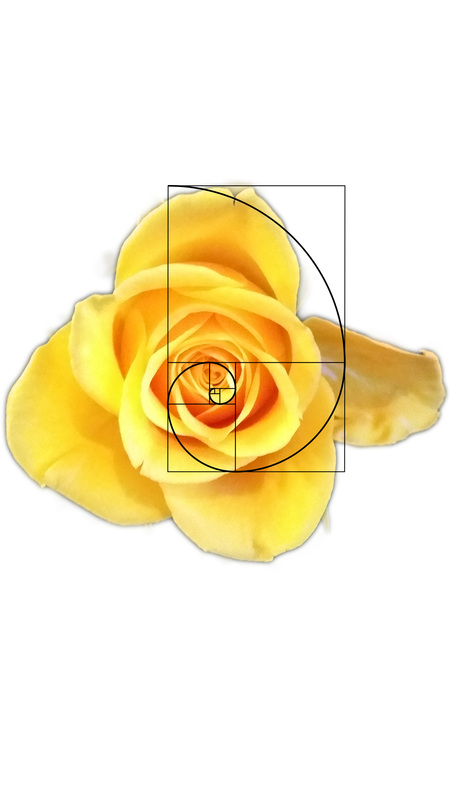
First Set Of Images
To carry on with my research, one day I had to visited a florist to purchase one of my family member roses or whatever type I would like best, as when I was choosing a flower I had realised that the pattern that a rose or any different type of flower it has created a spiral. To carry on my research I have also went and researched maybe the reason why a flower has created a spiral and this is by the fibonacci series.


WWW
But the things that went well was I have taken successful pictures of many different types of flowers that has created the spiral.
EBI
The thing I could do better next time is that using a DSLR camera and focusing the spiral than the whole flower - making the spiral in the middle of the flower the main focus.
Fibonacci Series
As for I had searched Fibonacci this is because the Fibonacci Series creates a proper spirals with the numbers; 1, 1, 2, 3, 5, 8, 18, 21, 34, 55, 89, 144...
Another Creation...
The things that has went well while creating this image that, when I had visited a local florist thankfully they allowed me to take a set of pictures of their flowers to capture the spiral in the picture, which that went really successful. After taking these pictures I had a thought about what I would want to do with these set of pictures after for a final piece so firstly I went to photoshop and cut cropped out the flower out of the picture so that could be our main focus. But then after that I did not have no clue whats so ever. What I could do better next time is that I could take more set of pictures of different type of flowers and then crop them out so that they are our focus and then layer them on top to make one picture out of them to maybe to create a final piece.
Set of images...
While I was taking a walk around the school ground, I had a thought of maybe just collecting objects from the floor or some place else. Which I found many different objects such as; pencil, sticks, twig. By collecting these objects I thought of linking my work to Andy Goldsworthy's work, and creating a spiral which them.


Set Of Images...
When I was trying to think of more ideas, while I was looking around, I have realised that one of my friends hair has really curly hair, so if you focus on one particular hair and zoom into it you would see the spiral clearly.


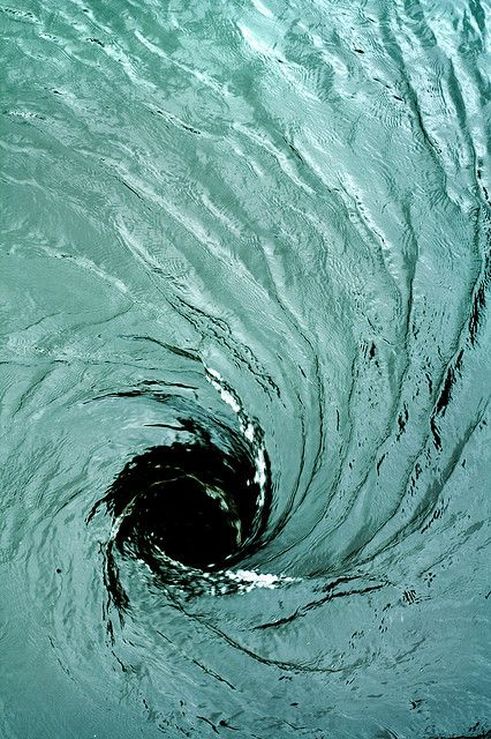
Another image from pinterest
I was inspired by the way the photographer has created a spiral with water.
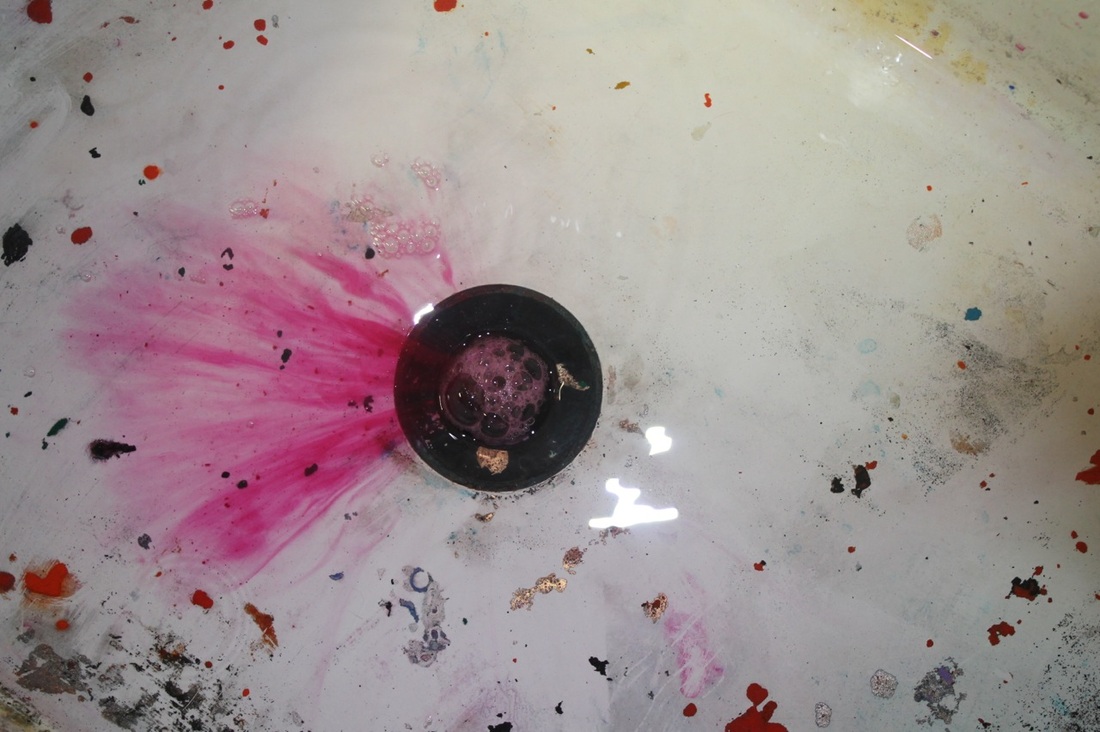
Another set of images
I was inspired by the way the top image as you can see, they have filled the area with water and maybe pulled the plug whole which creates the spiral. I investigated it with the schools sink first to see if it would work, but as you can see it wasn't really successful this is because the hole was a bit to deep for it to create the spiral. I also tried it was ink, so we could see the spiral a bit clearer with the white background.


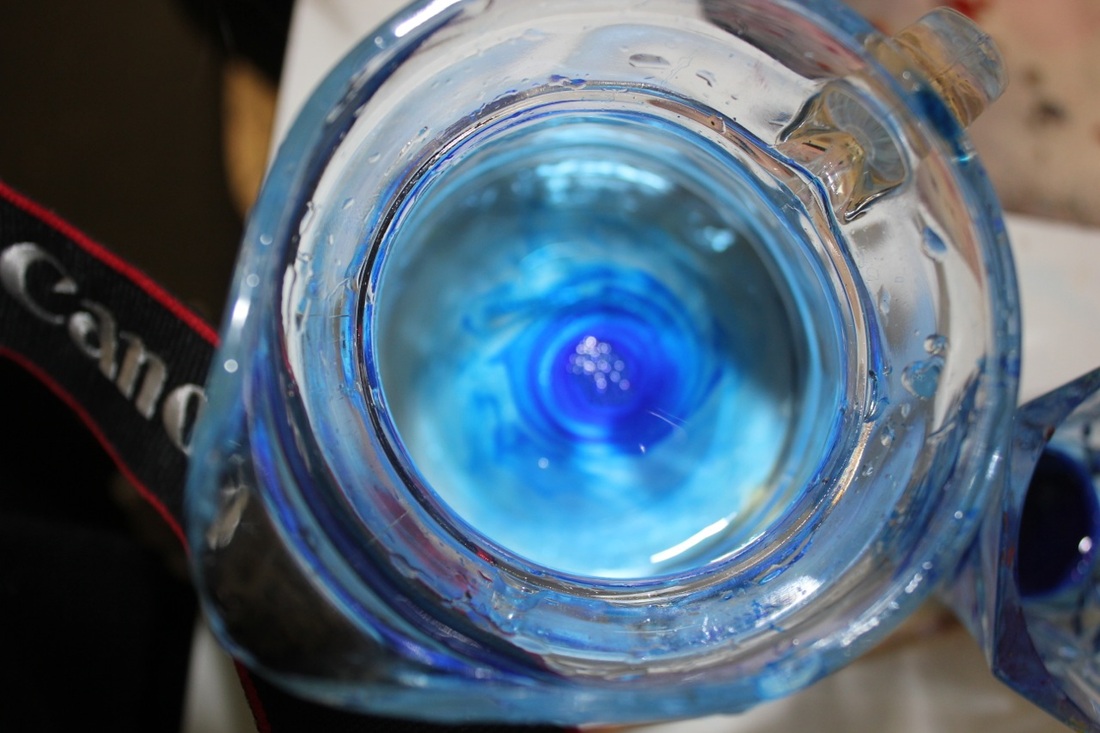
Creating a spiral with a jar.
I took a fancy jar filled it up with water and then used the opposite side of the paint brush and mixed the water as fast as we can so we could create a spiral, but then you couldn't really see it really well so I thought about adding a little bit of colour into it, however that also did not work maybe because we did not mix the water fast enough or we added to much ink into the water or maybe we didnt do it right. For next time I could use a machine to mix the water for me, so it could create a proper spiral and at the same time I could add a little bit of ink to add an effect of the spiral. As for we also tried out the toilet because some of the toilets creates a spiral when you flush it but as I have realised only some of the toilets does that, so that did not end up well. But for next time I could go visiting different toliets and trying many times to create a spiral. Plus we have tried out the toliet sink as well just to make sure if it would work so we experimented it with that aswell, but as for what I have realised is that the sinks plug hole has to be in a certain height (not to deep or flat).


Richard Long.
Long was an English sculpture and was one of the best land artists. 'A photograph of the trail left in the grass by walking back and forth in a straight line.'


Experiments in the dark room.
By collecting objects which has a spiral on them I have placed them on top of each other by laying them, and then using them I have created something really different. At first I have just layered the object on top of each other for an experiment to see how it would look at first but then I didn't really like the black background in the picture so I placed a piece of paper with a circle in the middle so we could only see the design in the centre of the image.


Idea...


|
I have chosen this layout because I wanted it to be in the order of the least design to the most. I have found this more interesting this is because you could see my development.
|
With this one I have done something totally different. I have placed them into colour order but in black and white. This also looked in interesting this is because of which its contrasting each other.
|
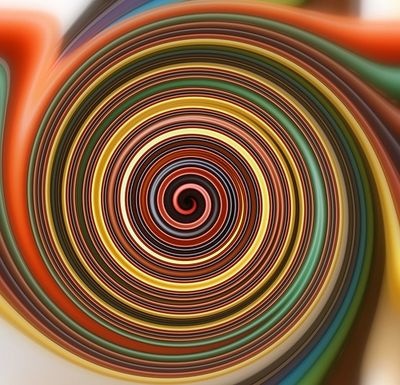
Another Image From Pinterest...
While going though the tallis pinterest board, I had found this image as an inspiration. By layering different coloured papers and rolling them up together you would get a perfect spiral like the image below.
Experimenting with paper.
Because the image above has inspired me, I thought of developing that by created my very own spiral with paper. But for something much different I wanted to try it out with just white paper to see the difference between the two - but the only difference was that by using colourful paper you would see the lines of the paper creating the spiral but with the white paper due to that its one colour you could only see a few than a lot of it. As so I didn't really know how much paper I should of used so just for a starter I got a few, but that didn't really end up well, this is because there was a lot of paper as so we couldn't fold the paper well enough to create the spiral. But too keep the experiment going I tried it out with less amount of paper, that also went well but there was something I was doing wrong at first, which I was rolling the paper the wrong way round. However at the end when I got the amount of paper right and the position right, I got the perfect spiral!


Editing
When using the picture above for inspiration, then I thought how about creating a similar edit to that one, so with that idea I have selected one of the best images out of the set of images I have taken, The one that the paper has created the perfect spiral and also thats really focused. However going back to the editing by choosing this image, I went into photoshop and changed the colour and cropped it into a square, also trying to make the paper spiral the main object in the picture.
Before...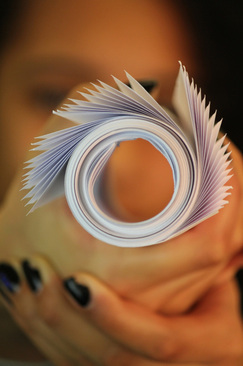
|
After...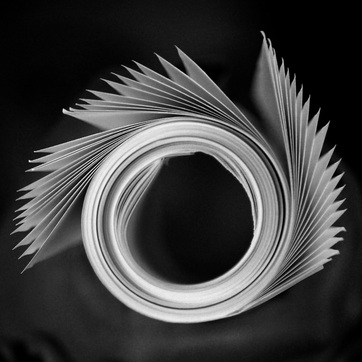
|
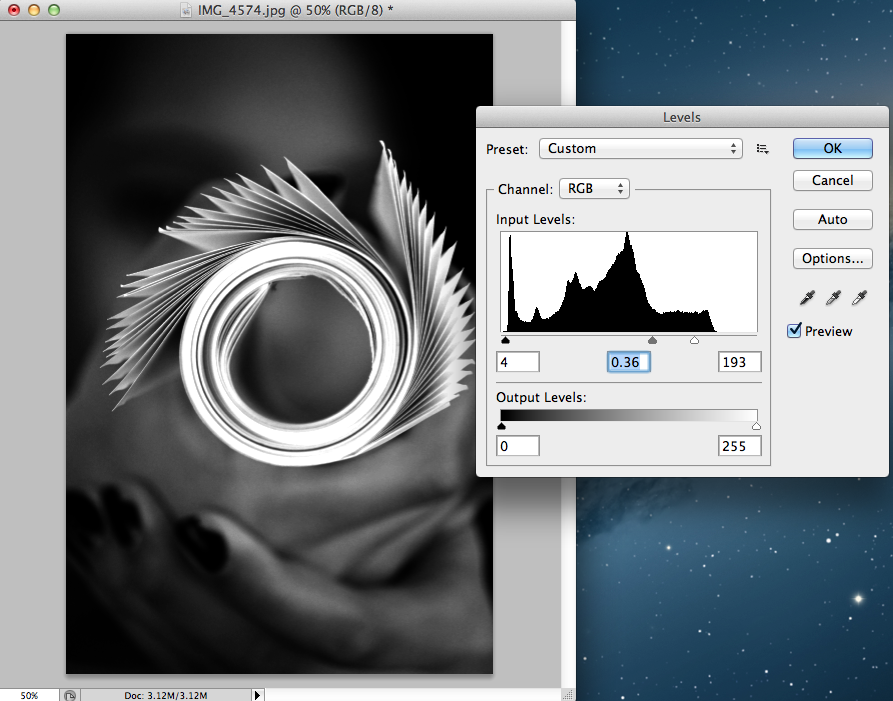
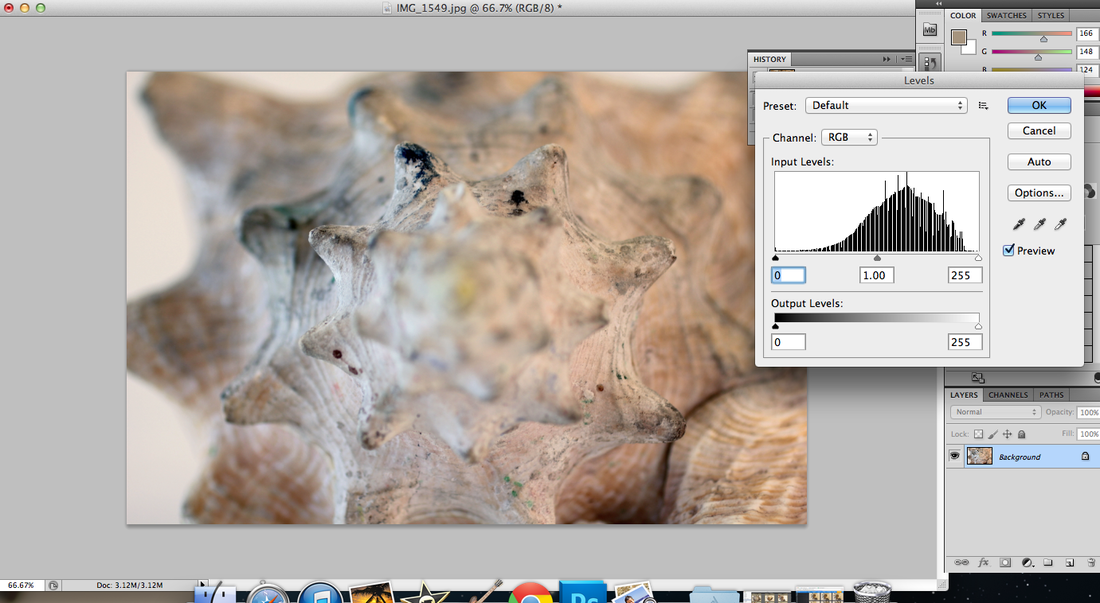
Stages...
First of all I though of changing my picture into black and white, but then it did not look how I wanted it to. So I looked at different presets, it was out of black and white, high contrast red filter and lighter so I have chosen lighter so that then...
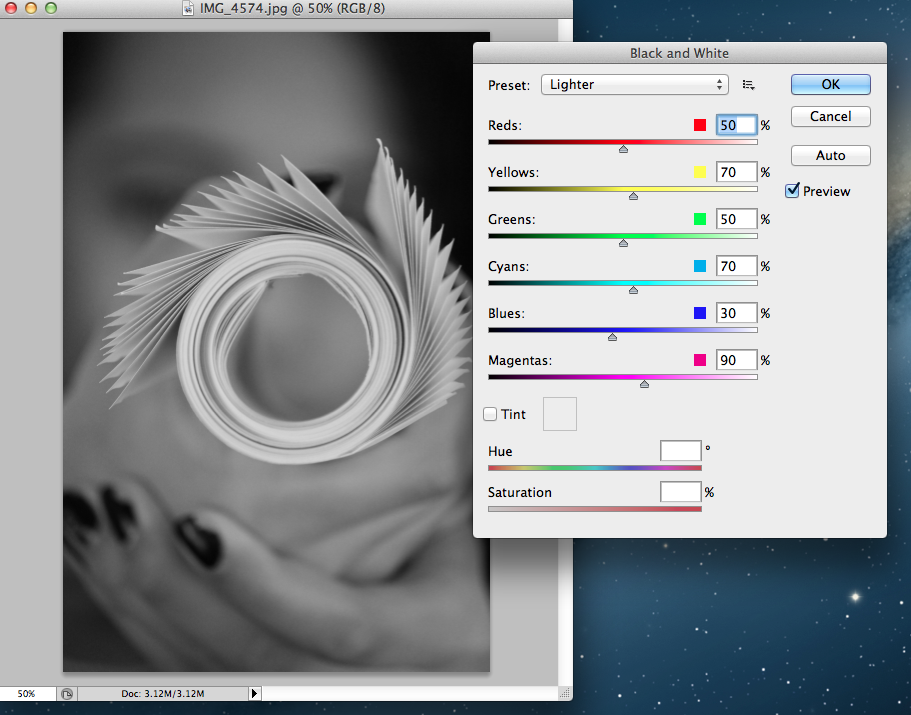
I changed the levels of the image to make the spiral stays white and make the paper the focused one but the background is all dark.
Yuval Cadmon
Yuval Cadmon has been engaging in photography, since the days when one of he's family member taught him the secrets for photography and the magics of influence with him and teaching the tricks in the dark room made him.


Light painting
By looking at the light painting of Yuval Cadmon's work, I thought of experimenting with light painting myself. At first I didn't really know how to set the DSLR but with some research of setting it up the job was completed. So at first the pictures did not end up well this is because of the lighting in the room, so to develop the picture we took out less light, after by trying it out that way; and that went well, I had to think about how do I create the spiral? So I went and got some rope of tied the little torches onto it, one by one and then swing it around my finger to create a spiral look; so that ended up really well, but I also wanted to try out something much different, so I took out the rope of tried creating the spiral by me just moving the arms around.


More experiments
By experimenting with light painting once again I thought about the timing of the exposure of the camera. And this time for something different I thought of using a stick of add all of the colours onto it and create a final piece similar to Yuvav Cadmon's work. So by using the stick I just twisted it around my hands to create the spiral look but then, I realised that I was just repeating my experiment that I have done before hand, so for something different I placed the stick really high and started turn around in circles and slowly bring the stick down to also get the spiral effect.


Another Set Of Images
This time for the jars I have used another type of lens which was the macro lens - the effect the macro lens gives is that you could make it focus on the thing you want to you want it to and make everything else invisible by blurring it out. Well using this lens at first I really did not know how to use it so with these images that I have taken of the jars are just like normal images taken from a normal lens. But however the images was really successful but also really hard to create this is because I had to keep on changing the water after completing one experiment but also trying to create the spiral with the effect of the different coloured paint.


Another Set Of Images


Before...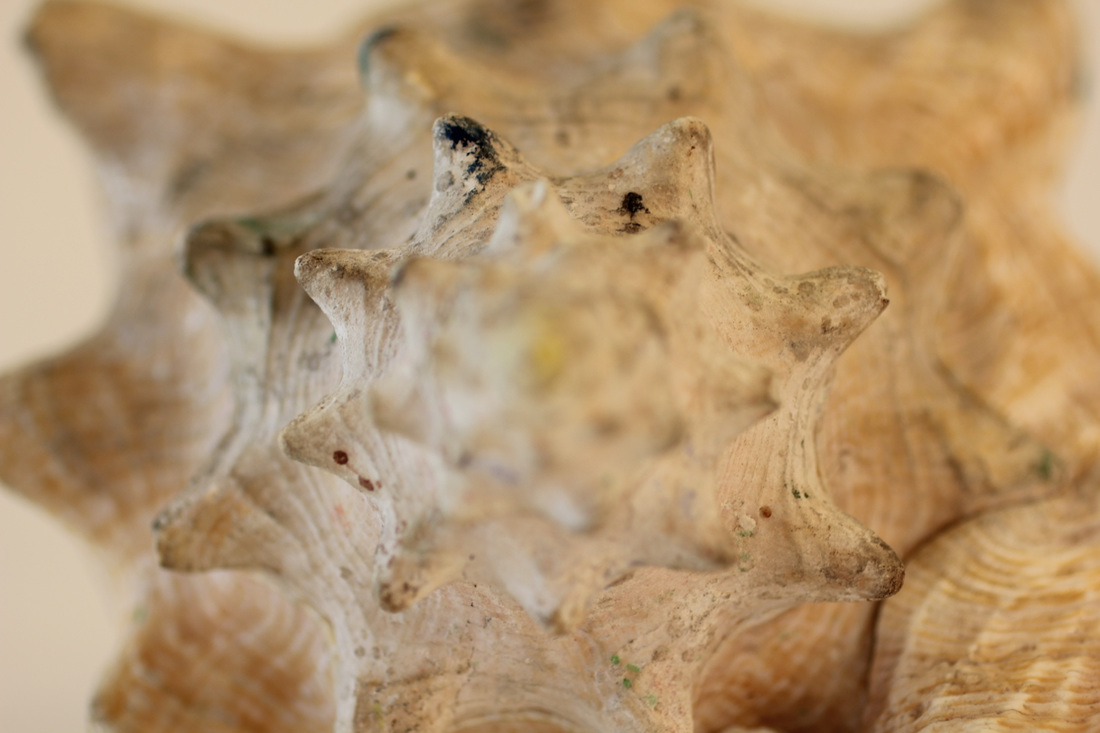
|
After...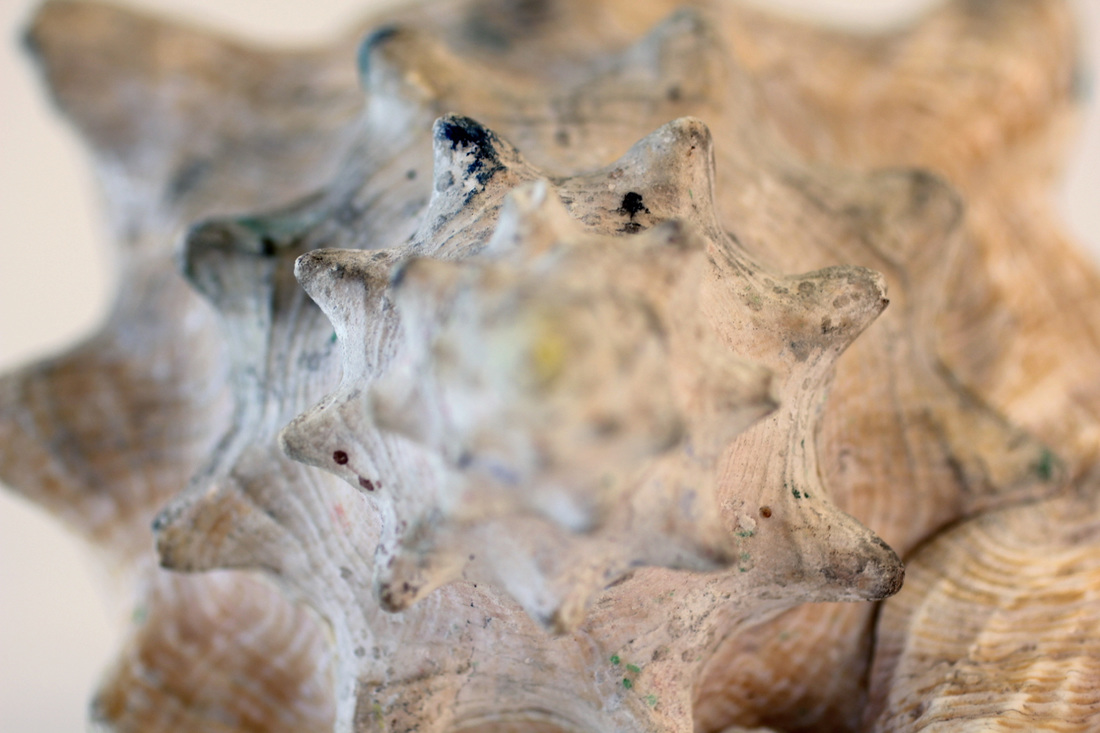
|
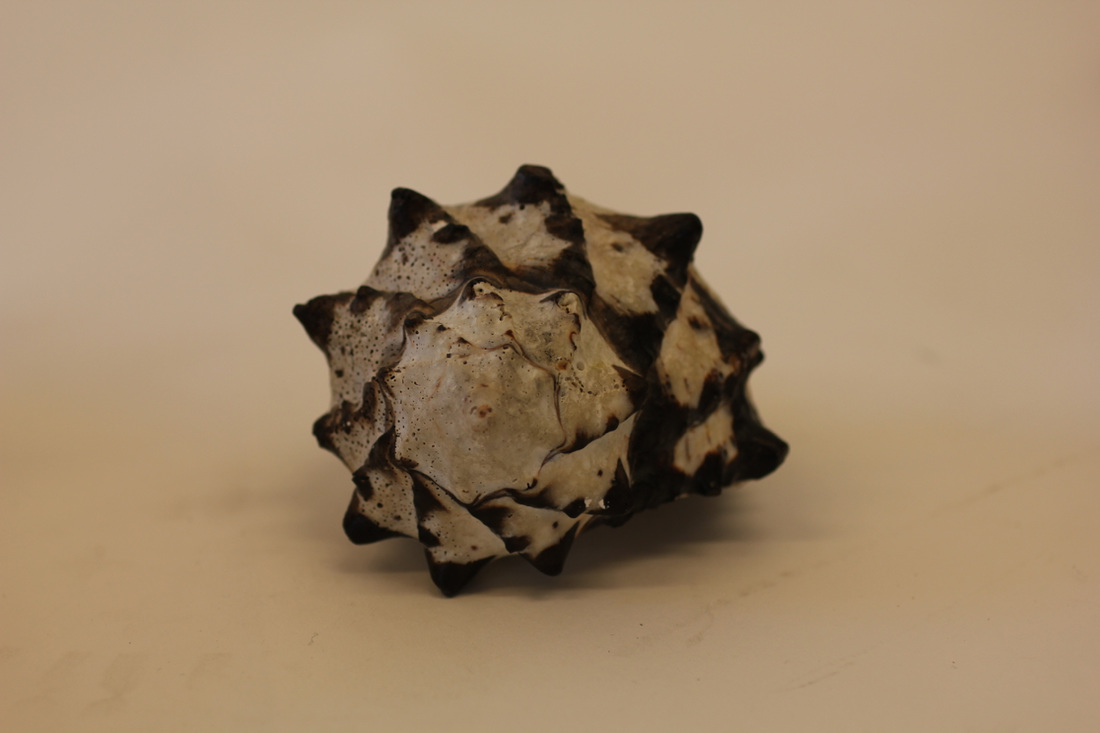
What I have done in these images are, by using a macro lens camera I have taken many pictures with that camera, this is because I wanted it to focus on one bit of the object and the other bits unfocused, this has an effect by making the audience wonder what the object really is and by seeing the actual spiral on the object.
Editing....
Using the picture I have selected before of the shell I have used that image for my final piece so I thought of editing it using photoshop. By doing that I have changed the levels of the image due to I wanted it to be more 3D than a flat object in a picture.
Final Pieces...
For my final piece I have thought of using the pictures I have taken of the shells, by selecting 5 of the best images, the ones that are clear, thats been focused on. After doing that I have used the process above and edited the following images and got something like this...


Another Set Of Images...


Experimenting With Light Painting...
This time while taking another set of images of light painting, I tried something totally different this time. I decided to place the lights on the sticks and then with them I moved the stick as fast as I can but also trying to create the spiral, with many different colour into it.


Final Outcomes


Final Evaluation
The theme I have chosen is spirals. I have chosen this theme because I thought it would be an interesting theme to do, this is because choosing the theme spirals it would be a bit tricky, this is because at the start I didn’t have no ideas what’s so ever on how to start it and what types of pictures I could take because if I went out to take picture of flowers it isn’t the time of the season for that - but forgetting all of that I wanted to take the challenge. By looking through pinterest I have gathered some ideas for my chosen theme, by doing this I would have many different ideas and inspiration to create my very own piece of work. Researching photographers and taking some idea from them was really useful for example; Andy Goldsworthy, he was really useful this is because he created a spiral with natural forms – just by collecting objects off the whole from where he was standing, he would create the spiral with many different natural forms for example; leaves, mud, pinecones, snow, stone and etc. with the inspiration of that I thought of something totally different because while I would doing some research I saw that a flower would create a spiral and with that research I went to the local florist and checked it out for myself. With the thought of that I had taken a set of pictures so many I would create a final piece out of it. As I said when I had researched it I learnt something new myself and that was that a flower was created because of the Fibonacci series with these numbers; 1, 1, 2, 3, 5, 8, 18, 21, 34, 55 and etc. But while I was still trying to find out more images to create and take I realised that my friends hair was curly enough – that looked like a spiral from many different angles. Another thing I did was what Andy Goldsworthy had done just collecting objects from where he was, so what I did I went out to the school ground and while walking around I would just pick up different objects off the floor just to create a different type of spiral – it was just an idea. Just by looking through pinterest you will find the most interesting things and inspiring – so I had found water creating a spiral using a sink, so I thought I would like to try that out but the first few times is wasn’t really successful because I wasn’t using the right type of sink. But to keep my experimenting on I tried it in many different ways for example; a jar, a sink, a toilet. So that didn’t really turn out the way I wanted it to but then I researched another artist called Richard Long, he created different types of spirals with landscape and natural forms. With that I went into the dark room with many objects that would create a spiral and over lapped them on top of each other.to keep my investigation going I went onto pinterest again and found something that I don’t think I would have ever thought of doing – which was rolling paper? How can rolling paper create a spiral? I was shocked about this but I wanted to try it a go, but I didn’t know how much paper to use at the time so I just took a bunch and rolled it first I told my friend to hold it on her eye so I could focus the camera to her eye than to the paper. Well that went successful! By collecting shells I had placed them onto the table and got a micro lens camera so I could only focus on the spiral to create a final piece which also by editing it. I have recorded by ideas and processes in many different ways by evaluating them and screen grabbing each move I do for the edits especially in photoshop. I am really satisfied with this unit this is because at first I didn’t really know what I was doing but just by doing a little bit of research it will get you somewhere, research an artist gets some ideas out of it and use them for your inspiration that’s what I done which it helped me a lot. Taking a lot of pictures will also get you somewhere as well this is because even if you don’t have an idea by taking those pictures they could stay there till you would find something to do with them for example; editing them with photoshop or playing around with the chemicals creating cyanotypes or photograms etc. But it has been a really successful unit to work for, you would gain more ideas for the future…
